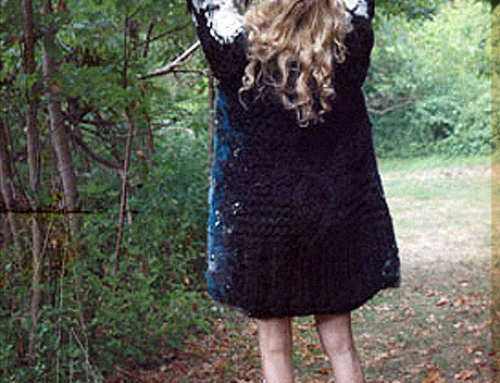
While designers like Raquel Allegra, whose hand-shredded shirts go for $1000 a pop, are determined to thin out my already emaciated wallet, savvy do-it-yourselfers are not only successfully recreating Allegra’s shirts (i.e. Camille at Childhood Flames), but also Rodarte’s knitted nylons and Alexander Wang’s (love-it-or-hate-it) oversized cut-out sweater. There are even the inspired minority who sew from scratch, trying on trends before they take the mainstream. Gutsy.
For me, sewing is a phobia right up there with heights and the dark. But while you can close your eyes to the latter fears, with sewing you have no choice but to watch as the needle spears your one-off dress that you’re trying to shorten yourself to save ten or twelve bucks. This horror is only surpassed by the lurid and more painful fear of stitching said garment to your hand. Not pleasant. But I digress. This article is supposed to be about the benefits of sewing and DIY. And a joyful thing it can be, if you’re (moderately) good at it.
Take Aimee Tabolka for example, designer and intern at Carte Blanche, who recalls ripping off the sleeve of her cardigan in her youth to “put it on as a toque.”
Prior to becoming an avid sewer, Tabolka’s hobby of re-working vintage clothing substituted for her lack of skill. “[W]e kind of had this whole thing of taking old and making new styles, but totally using all the fabric to make something really now,” she says. “So, like taking the sleeves off certain dresses for the pattern, or creating linings for jackets, or making a puffy sleeve on a t-shirt with different fabric. That was definitely a hobby before I even knew how to sew on a machine.”
According to Tabolka, people DIY to “mimic quick looks.” And with fashion now moving at the speed of broadband, being able to DIY is assuredly an economical asset.
Where to start? The Workroom (1340 Queen St. West), Toronto’s premiere sew and craft by the hour studio, located in the West Queen West area in Toronto, is a tidy storefront sewing studio that offers a beginner’s sewing class for only $50 CND, and an “Easy Alterations” class for only $45 CND. If handwork be your forte, you can take a class on natural dyeing techniques, or how to make a dress shirt. Make (195 Chrystie St.), a design and craft studio located in New York, offers sewing, embroidery, and crocheting classes, not to mention shoemaking, soap making and wallpaper making for the zealous arts and crafters. And lest we forget, Liberty (Great Marlborough St), the landmark London store known for its distinct collection of printed fabrics, has re-upped their in-store sewing school in response to the media buzz around DIY, as perpetuated by the global economic funk. “We set up the sewing classes due to the press picking up on make-do-and-mend [trends] in these economic times…we have seen a lift in the knitting schools we run also,” says Sharon Brant, who works with Liberty to create these stitch workshops. While offering a beginner class that covers the basics—including how to follow a pattern—Liberty also offers a class that will teach you how to “jazz up” your little black dress via revamping and customizing, thereby increasing your uniqueness factor by at least ten percent. And, really, isn’t uniqueness the cool cache desired by all style mavens?
Economical, leisurely and in vogue, DIY fashion is a crafty solution to a withering wardrobe.
ARTS & CRAFTS
This DIY braided necklace will help you update that ratty t-shirt you’ve been coddling for eight years.
SUPPLIES:
Scissors, old-t-shirts, tulle (optional), one yard of fabric (optional), needle and thread (optional).
STEP 1
Cut t-shirt in one continuous strand or, if using fabric, cut three lengthwise strips. Make sure to vary the width of each bunch of strands.
STEP 2
Fold strand into three sections that are even in length. For a thicker braid, double or triple the folds.
STEP 3
Tie a long strand around the bunch to secure it. Begin braiding. If using tulle, wrap tulle around the cotton strands then begin braiding. Leave ends loose, or fasten with elastic band.
STEP 4
Attach all braids by knotting the braid ends.
STEP 5
Cut loose ends just enough to tuck into the knot. Note: if you cut the end too close to the knit, your necklace may unravel.
STEP 6
Drape or sew onto t-shirt.
STEP 7
Wear!


