There’s more to creating a damsel-to-love look than girly floral dresses and soft pink makeup tones this season. In fact, when in pursuit of a romantic aura, we suggest focusing extra attention to your tresses.
With the bounty of ultra feminine hairstyles seen on the spring/summer 2014 runways, channeling fairy tale enchantment has never been more on trend.
Below, a step-by-step guide to getting our fave spring hairstyles.
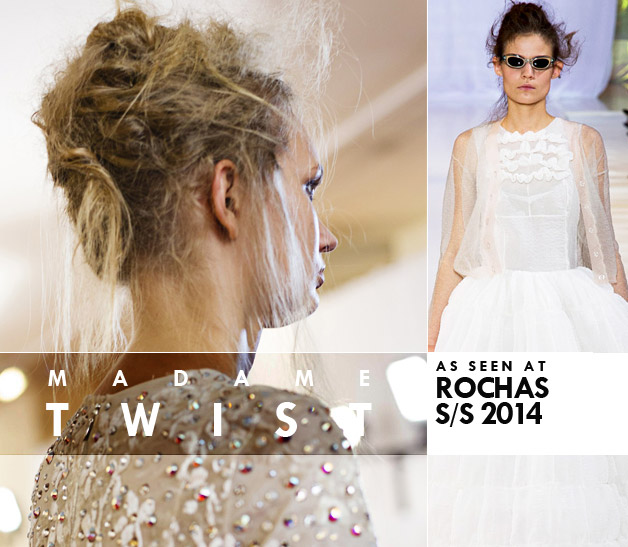
I love hair like this, especially for the spring and summer seasons when the wind is blowing your hair or you’re simply too hot to keep it down. The beauty of this style is that wind and heat can actually make it even better, plus it can work with any hair texture…though to be honest, the more texture you have, the better. It’s actually super duper easy and you can even put your own ‘twist’ (sorry for the pun) on it!
TIP: This style works best on 2nd or 3rd day hair, so don’t wash your hair the day you want to style it like this.
Step 1 – You want to start out with adding texture to your hair, so if it’s straight, you can rough dry it and then add random curls and waves for body and hold.
Step 2 – Texturizing spray is your best friend and my absolute favourite is Oribe Dry Texture Spray. Spray generously all over your hair, roots included, and allow to dry/set, though it really won’t be wet wet. If you are into saving your hard-earned money (who isn’t?), you can use a medium hold hairspray and then some dry shampoo on your roots for the same effect. After setting, you can brush through to distribute product and then rough it up with your fingers.
Step 3 – This style is not precise, so arm yourself with bobby pins and begin to grab random sections, twisting into buns and mini french twists and securing with pins by crossing them for more hold.
Step 4 – Rough up your hair with your hands by rubbing your palms over-top. You can even use your blow dryer to mess it up a bit too and pull a few random pieces out for more effect.
Step 5 – Mist with a lighter hold hairspray for a bit of hold, making sure to keep back at least 12 inchest to avoid that wet-look that a concentration of spray can produce.
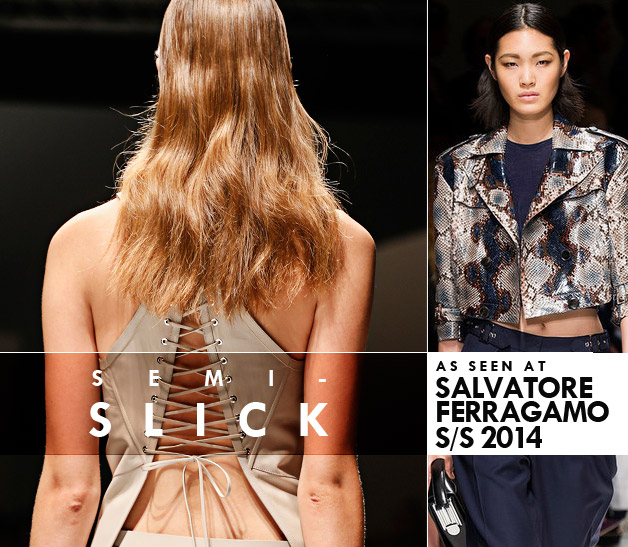
This style is very simple and chic, especially if you have straight or semi-straight hair. It’s all about lack of volume on top, without looking wet and slick due to applying a ton of product, combined with a more natural texture from mid-length to ends.
Step 1 – After washing and conditioning your hair, comb through a bit of styling cream and then going with your natural part (or middle for more of a runway look) smooth and tuck your hair behind your ears. I prefer to let hair air dry for this style, but you can also dry it on low with your dryer so as not to disturb the top, sleeker section.
Step 2 – Once dry, you can alter the texture if you want, either running a flat iron throughout (don’t make it too straight though) or lightly waving sections from ear down for more volume on the bottom.
Step 3 – Mist lightly with a soft-medium hold hairspray.
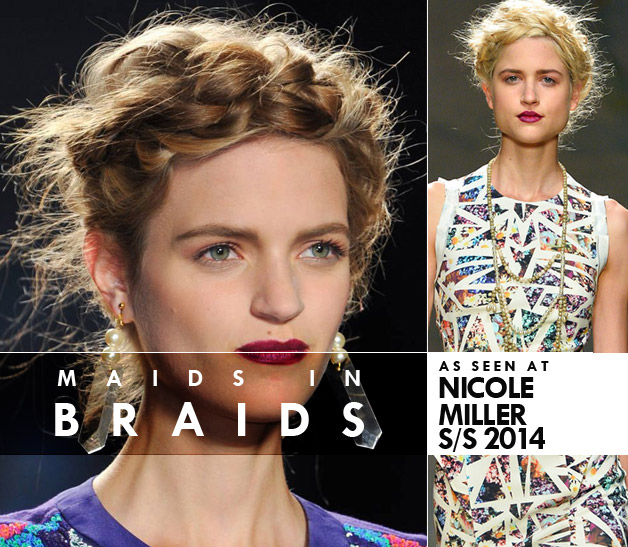
Braids are an easy way to take your style up a notch without too much effort, they’re great not only for day (we prefer the messy look seen on the runway of Giles), but can be dressed up for evening as well.
Step 1 – Start off by applying a generous dollop of mousse (I like Moroccan Oil Volumizing Mousse) to damp hair and rough dry. This not only adds texture, but also volume and will make the hair appear larger. It also allows the hair to stick together too.
Step 2 (day option) – For the Giles single braid mentioned above, you can add some volumizing powder to roots for lift (Schwarzkopf OSiS +Volume Up is a great one) and then loosely braid the rest of your hair in back, keeping it relaxed with a bit of controlled mess.
Step 3 (evening option) – If you want something more “done” like the Nicole Miller runway look shown here, it will all depend on the length of your hair. You can randomly braid sections and then wrap them around your head (bringing them to the front) pinning as you go leaving a braid in back to make into a bun. If your hair isn’t quite as long, you can do either french or dutch braiding at the front and across the top with a messy bun, twist or braid with hair pinned up in back.
Step 4 – Once braided, use your fingers to pull them apart slightly to loosen them and then spray with hairspray for hold.
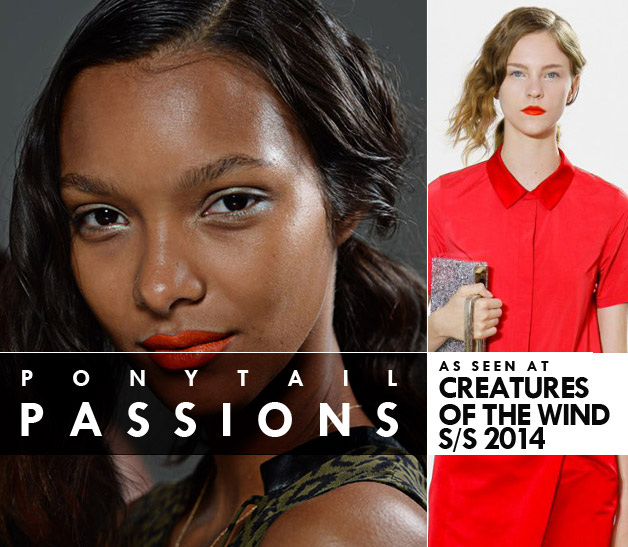
I love a good loose ponytail and this one works best with hair that has some layering around the face so that those layers can be left out to look natural and undone. If you have all one length hair, this will be more of a fashion forward look, as a large chunk of hair hanging out is a little more unusually ‘eye-catching.’ (You may want to invest in a few layers eventually…I can honestly say that they usually help with most styles anyway.)
Step 1 – Part damp hair on whichever side falls best and as before, rough dry hair and then brush it out. Use a mousse such as Marc Anthony Curl Enhancing Styling Foam.
Step 2 – Using a curling spray, Marc Anthony Curl Booster is fantastic and a staple in my kit, wave sections of hair (winding hair around the barrel of your iron from roots, leaving ends free and straight) in the same direction and let cool.
Step 3 – Once hair has cooled, you can brush it out or finger brush it to mess it up and pull it back into a low ponytail, leaving a front section out on the side that has the most hair.
Step 4 – Spray with either hairspray or dry texture spray.
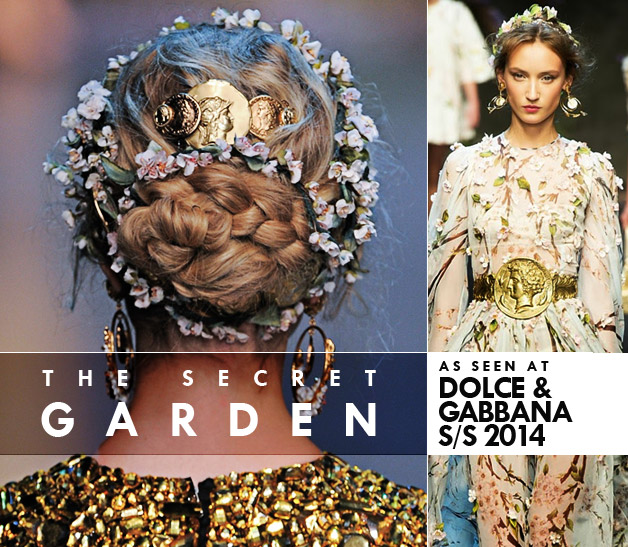
Another easy, romantic style that is great for the spring and summer is a period look, as seen at Dolce & Gabbana. Perfect for everyday wear, but also super beautiful for weddings, events or music festivals.
Step 1 – Try a product like Redken Powder Refresh to prep hair and give it a nice, matte texture.
Step 2 – To add more volume and make the hair easier to work with, curl and wave your hair in random sections. It doesn’t have to be perfect.
Step 3 – Part your hair in the middle and twist sections of each side back loosely, securing with bobby pins.
Step 4 – Make a braid with the remaining hair in back and coiling it, pin it flat to the head into a chignon.
Step 5 – Now this is where you can really have fun with accessories! Many stores are carrying embellished headbands these days that can really perfect your look. Try flowers, beads, jewels, coins — you name it! Or, if you are really ambitious, you can fashion your own “crown” out of real flowers.
Published May 4, 2014