Winter is nearly near, and as the sun sets earlier and earlier each day, the want for a beauty look that reveres drama over lip gloss increases. On the runway, it’s all about polished and mature glamour this season. Don’t cling on to that dewy skin look you’ve pulled from summer into fall, move on and usher in refined tones and textures that will take you seamlessly from day to night with a simple puff of face powder or the bounce of voluminous curls.
Below, the expert tips you’ll need to using this season’s new beauty products to creating fall/winter’s hottest runway beauty looks.
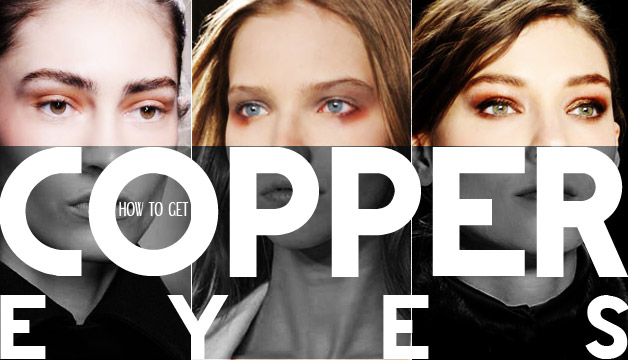
This is an all-time personal favourite of mine, as metallic, copper tones (more often than not) look fantastic on everyone.
Shown in various incarnations on the fall/winter runways by designers including Prabal Gurung, Chloé, Givenchy and Balmain, these hues brighten the eye, adding definition while allowing them to pop in a glamourous, yet subtle way.
If you have blue or green eyes, you are especially lucky; the contrast of shadow to eye colour will add extra drama in your case. The trick with this look is to show restraint. Remember, this isn’t paint-by-numbers, it’s a look that is chic and simple, so no heavy handed shadowing!
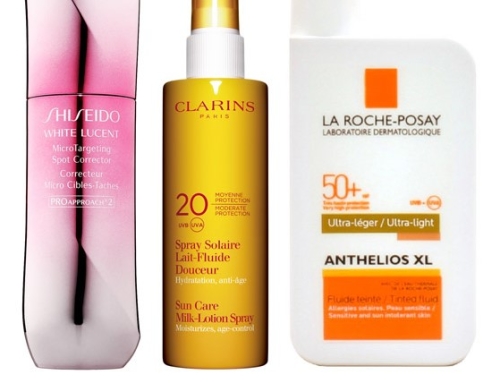
Step 1: Start by evening out your skin with a lightweight, semi-matte foundation and a light dusting of powder. I’m always a fan of keeping things as minimal as possible on this front, so as not to take away from the feature that is being focused on.
Step 2: If you’re going to use blush, keep it on the more neutral side in order to play up the angles of your face. Use soft matte tones of dusty rose that almost verge on taupe, applying to the hollows of your cheeks to create a bit of natural contour, without adding an excess of colour.
Step 3: The eyes are where it’s at here; take your copper eye shadow and a medium fluffy shadow brush and sweep the colour from the upper lash line to crease, then around the bottom lash line as well, blending out as you go. You want this to be a soft definition of the eye, avoiding hard lines.
Step 4: Add a few quick coats of brown or black mascara. Then, for extra pop, use an eye shadow in a champagne tone to dab on the inner corners of eyes.
Step 5: The lips are as simple as the skin; keep them on the nude-toned or bare side, without resorting to the concealer-as-lipstick method. Use nudes in the same tone as your blush, only a bit warmer; this will keep the rest of your face monochromatic, and shine the focus on those beautiful eyes of yours.
If history has taught us anything, it’s that this classic look will never — ever — go away. And for that, we can be thankful because this one is timelessly flattering.
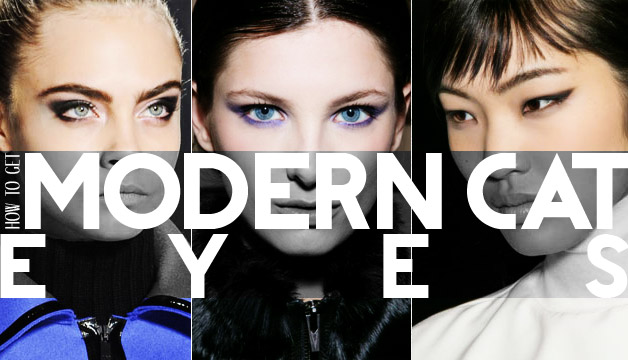
Lining only your upper lid can completely change the structure of your eyes, giving them an instant dose of sophistication and allure. However, these updated versions may just get you rethinking your old tried-and-true liquid pen application and to be honest, they’re actually way easier to master!
Try a coloured cat eye as seen on the models at Jason Wu’s fall/winter show; or, err on the more graphic side with a look that pays homage to Anna Sui runway; or, choose instead to smoke it out à la Michael Kors. Why commit to just one for the season? Let your mood determine which look suits you and your outfit best on any given day. Really, the possibilities with an updated cat eye are almost endless, so play around to see what you’re comfortable with and what works best with you eye shape.
Step 1: I’m pretty much going to be suggesting the same foundation, concealer and powder routine here (and throughout) as I did above. I mean, if there’s anything that fall/winter 2013 beauty trends have shown us, it’s that velvety matte skin is very much in. (Full details on how to perfect this look to come further down.)
Step 2: With a cat eye — I have to admit — I tend to have a soft spot for a touch of pink or peach blush on the apples of the cheeks to keep things more classic, but Michael Kors used a soft matte bronzer to give the girls an unexpected edge, and it really worked, so don’t hesitate to pull out your fave summer bronzer in the dead of winter!
Step 3: This eye requires less of a steady hand because you can use eye shadow, or — my favourite — cream-to-powder eye shadow. You don’t have to use stark black, in fact, using a medium to firm shadow brush to apply a more metallic soft black cream is quite lovely and adds a more contemporary shine.
Step 4: When applying, use a medium eye shadow brush to deposit the colour to the outer corners, concentrating at the lash line. Note, because it’s cream-based, you can blend it up and out as much as you want, keeping the lines as soft or hard as you like. Just remember to follow the natural lines of your eyes to get the best shape, and work quickly; this type of formula will eventually dry.
Step 5: It’s not a must, and I wouldn’t go overboard with it, but you can definitely add a coat of mascara to finish off the look.
Step 6: As for the lips, don’t go too crazy with colour, or any product for that matter — it can venture into something very period, very quickly. For a more modern and chic option, keep them almost bare, maybe just a little balm or nude gloss. Go easy in this area, you want the focus to be on the eyes, and too much makeup can easily make this look seem like it’s trying too hard to achieve dated silver screen glamour.
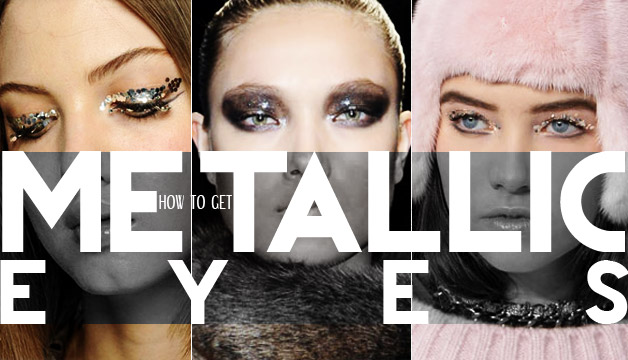
We saw different variations of metallic eye makeup at Donna Karan, Chanel and Gucci for fall/winter, and while the runway models’ looks were a little overdone for the average woman to wear everyday, when given a more realistic spin, they’re perfect for holiday party season, which is soon to be upon us!
Try shades of silver, pewter and platinum when creating this look, and don’t be afraid of a little bit of shimmer or sparkle. For a more futuristic look, apply some well placed fine glitter; your bold beauty choice will have people oohing and ahing each time the light hits your eye.
Step 1: Jumbo glitter was used at Chanel, and if this is where you want to go, have fun with it! Should this be just a tad too much for you, a glitter eyeliner can be your best friend when trying to create a metallic eye. It’s not only super easy, it’s super fast and accurate. Use it to line your upper lash line or just give your inner corners a pop. It will still be eye catching without being over the top. Scared of glitter? Go with metallic eye shadows or pigments in the shades mentioned above to creative a seductive, smokey eye. Work with a darker and a lighter tone to create depth and dimension, then add mascara to both the upper and lower lashes to add to it.
Step 3: For more definition, take a black eyeliner or cream liner and apply to your inner rims of your eyes (also know as the water lines). This will really make your eyes stand out.
Step 4: A ‘done’ eye always calls for a nude lip, and while I love that, I’m going to have to ask you (again!) to exercise restraint when it comes to lipstick application here. Simple is best, undone is beautiful and unexpected — not to mention easy maintenance when you’re snacking, drinking and chatting on dinner dates or at parties. So pat — pat — on some lipstick, gloss or balm, which will ensure a super light application. Now enjoy your night out, free of beauty touchup worries!
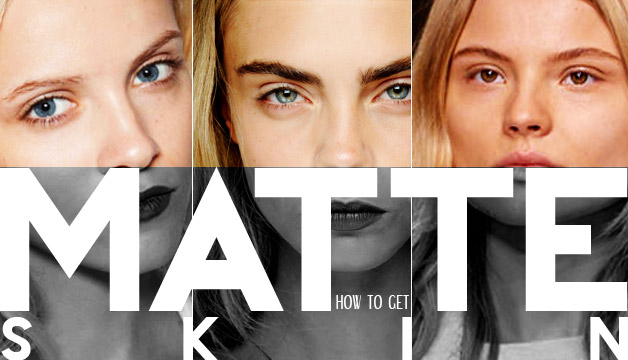
This look was everywhere on the fall/winter runways, but it wasn’t the heavy and cakey version we remember from the ’90s. No, gone are those overzealous applications of powder from generations past (if you can believe it, back in the day there was a company that suggested rubbing your loose powder into your face with your hands — oh the horror!), today’s matte look is fresh with a luxe velvet finish that any woman can achieve.
Dewy skin will always be in, but matte is definitely having its moment thanks to Valentino, Phillip Lim, Alexander Wang, Chloé, DVF, Balmain and Calvin Klein. I told you…it was everywhere!
For this finish, you want to work with products that are specifically matte or luminous matte. The key here is application and technique; you want to layer using small amounts of each, and when finished, you need to buff and blend with either a brush or dry sponge to take away any excess product.
Step 1: Start out with your foundation and apply it with your fingers, this allows for the heat of your hands to almost melt it in, making it one with your skin. Think of this technique as creating a translucent matte look — one you can almost see through.
Step 2: Next, take a light concealer and apply only where needed (usually just under the eyes and around the nose). Again, don’t use anything too heavy; I tend to favour concealers that come in pen form, as they usually can’t be overdone and keep your skin’s natural texture.
Step 3: When it comes to applying powder, take a large fluffy brush and lightly dust your face, moving in a circular motion. There are many powders on the market, but as stated above, luminous matte is where it’s at!
Step 4: Your blush shouldn’t be shimmery or full of shine, you want to keep that velvety finish throughout by using soft pink or rose shades to add a hint of colour and contour.
Step 5: Eyes are the same, keep with the matte theme, but keep it natural using satin-matte finishes in taupe-y tones to contour the eyes and add depth. You can add mascara to take away some of the starkness, but you don’t have to — stark can be cool too.
Step 6: Your lips don’t have to be super matte, especially if you are keeping them natural or nude. In fact, matte is amazing with deeper or brighter shades, but can be tough and dry with others such as nude. Use moisturizing lip pencils that add a sheer veil of colour and a small amount of shine, this will keep lips from looking too dull. If you are going to do an actual colour, matte is fine, just remember to take some lip balm along with you for touchups later on in the day.
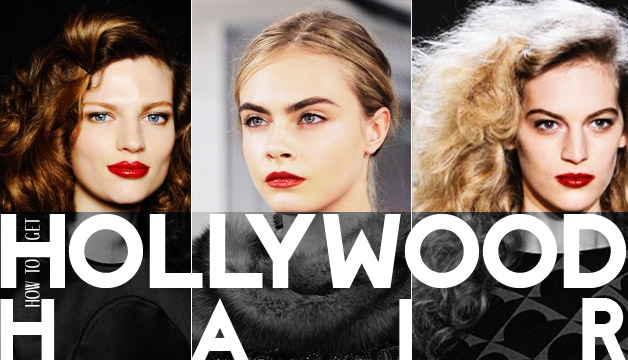
For many seasons now, we have seen mussed up waves, but this season was also loaded with full-on done Hollywood hair — both up and down — and let me tell you, the down was big!
Check out Bottega Veneta, Rochas and Marc by Marc Jacobs fall/winter runways for some of the huge voluminous styles that caught our eye. A mass of fluffy waves and curls, the looks were set old-school style and then brushed out for an updated, more dramatic effect.
The beauty of styles like this — styles that are a more modern take on the painstaking perfection of the past — is that said perfection is passé. You don’t have to go to hair school to learn how to set your hair, you are allowed a bumble or two. And, guess what? Frizz and fly-aways are (gasp!) embraced by current trends.
Step 1: What you’ll need: a tail comb, curling spray (plain old hairspray works too), numerous hair clips, a large paddle brush (or similar) and hairspray again to finish.
Step 2: Start off by sectioning your hair at the top into 1” by 1” sections as you go. You’ll want to spray each one and curl it from the bottom up with an iron. Pin each curl to your head with a hair clip. For the style that was seen at Bottega Veneta, you will want to leave a few inches from the top free of curl. Tip: For larger curls and waves, use larger sections of hair or a larger curling iron, for smaller, tighter curls, do the opposite.
Step 3: Keep working from the top down, just keep sectioning, spraying and pinning.
Step 4: When all of your hair is pinned, give it a mist of hairspray to help it set and allow it to cool. This step is very important: the longer you let it cool, the longer the curl will be maintained.
Step 5: Once cooled, remove pins and shake curls out, finger combing as you go. Next, take your paddle brush and brush out the ringlets into the style that works best for you. The great thing is that set and curled hair is very versatile and malleable, so have fun with your part and play around to see what best suits your hair and face shape.
Step 6: Mist again with hairspray when you have achieved your desired look, and don’t be afraid to throw a bobby pin or two in to keep the top sections smooth. And there it is, red carpet elegance is all yours!
Sheri Stroh is a professional makeup artist and hair stylist with the Plutino Group.Published November 18, 2013